HAMMER & ANVIL VR KIT GUIDE
519-574-0018
Setup & Operating Guide

VR Headset
Rental Kit

Everything your booth staff need to run the headsets — written for people with zero technical background. No menus, no fiddling: put it on, the video plays.

The 30-second version
01
Charge everything fully overnight before show day.
02
Plug the headphones into each headset — and don't unplug the small jack.
03
Guest puts it on → video plays. Takes it off → it restarts.
04
Wipe lenses + ear cushions between guests.
Stuck on anything? Text or call us.
519-574-0018
A real person answers. The phone is your fastest fix for anything not in this guide.
Section 02

What's in the kit

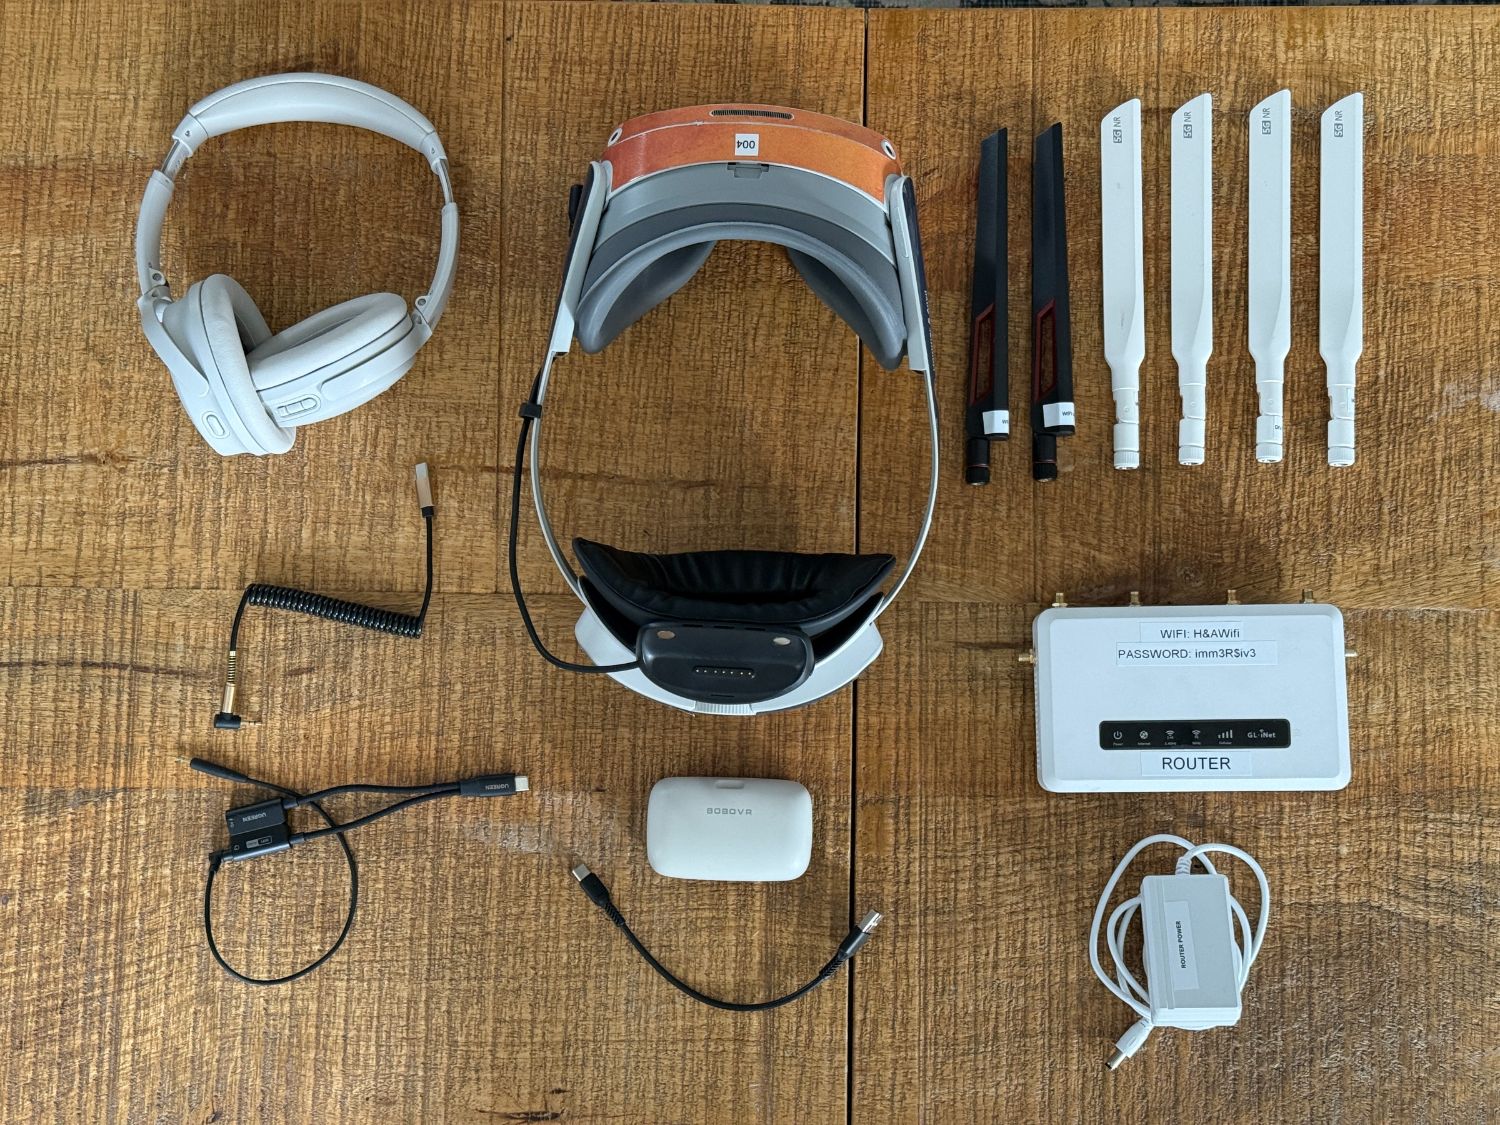
Tick each item as you unpack — and use the same list at the end of the show to repack. This is your return checklist too.
Pack
Repack
{{ item.qty }}
{{ item.label }}
{{ item.note }}
The full VR rental kit laid out flat
The full kit — your unpack and repack reference.
Section 03

Headset basics

The Pico 4 Ultra Enterprise. Three things to know: the power light, the battery dock on the back, and how it fits.

Power & the indicator light

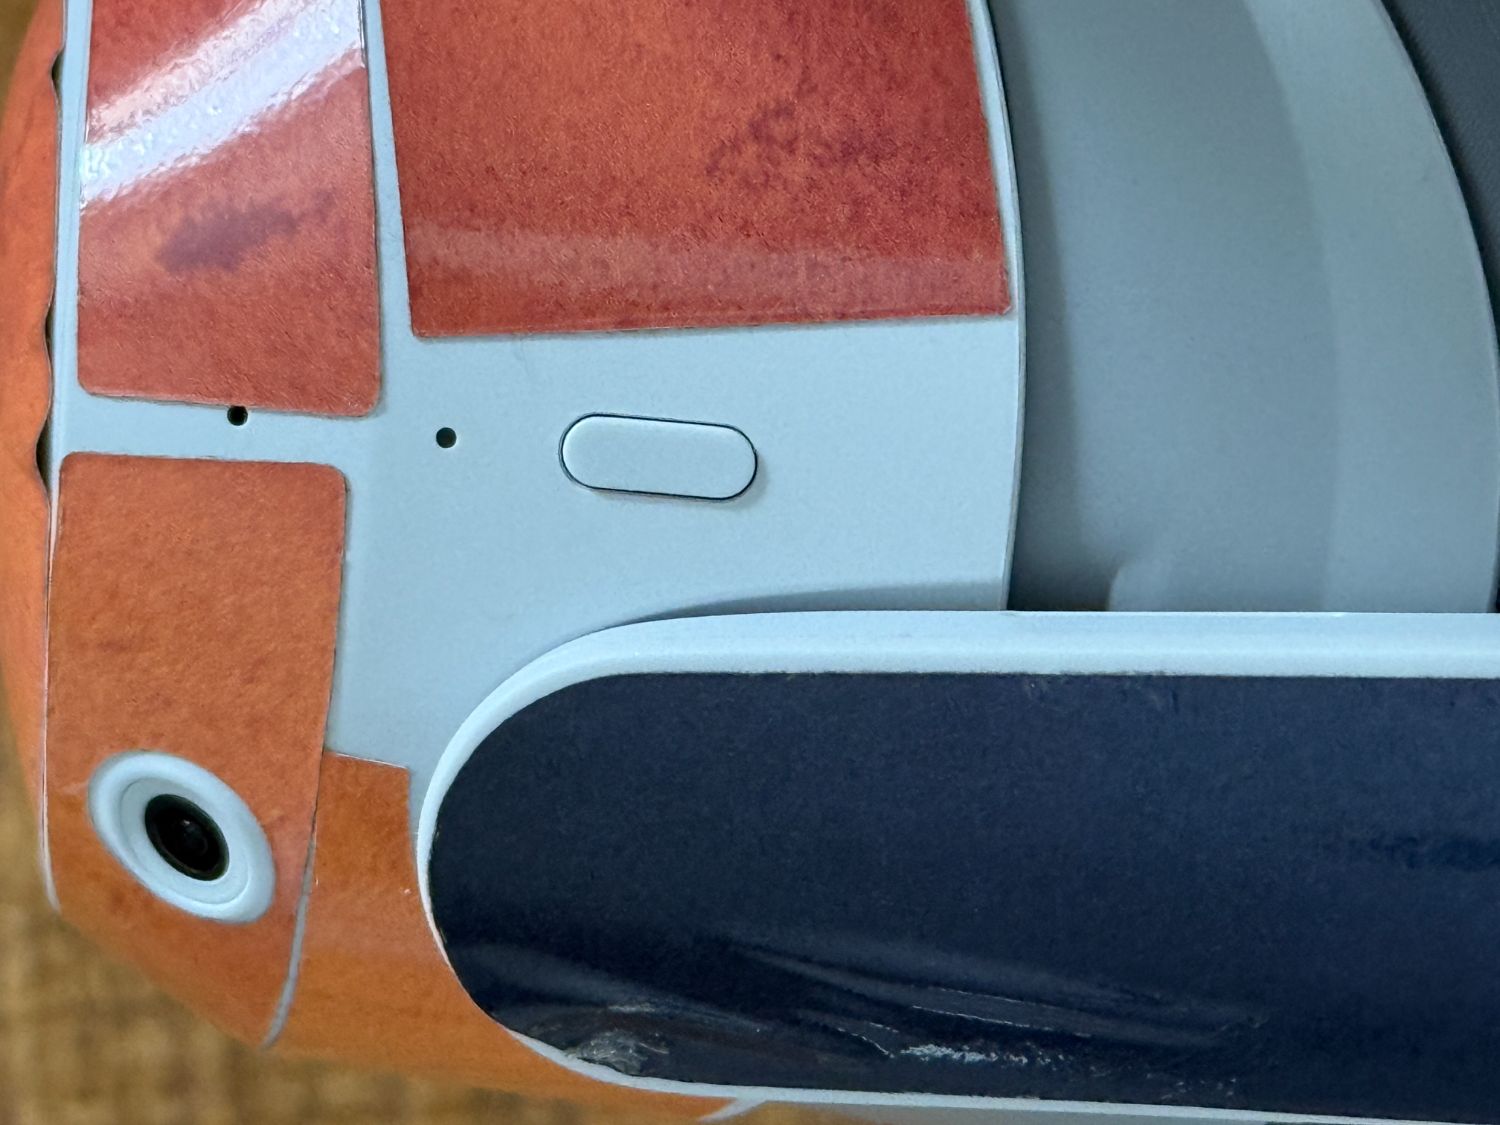
The power button and a small indicator light are on the right side of the headset.
Solid white — powered on and ready.
No light — powered off.
Flashing red — low battery, needs charging.
Headset power button and indicator light
The headset's power button and indicator light.

The battery dock

Each headset has a magnetic battery dock on the back. It snaps on and off — no wires. A small check button with LEDs shows the charge level. There's no on/off switch — it passes power through passively whenever the cable is connected, so the headset simply runs longer.
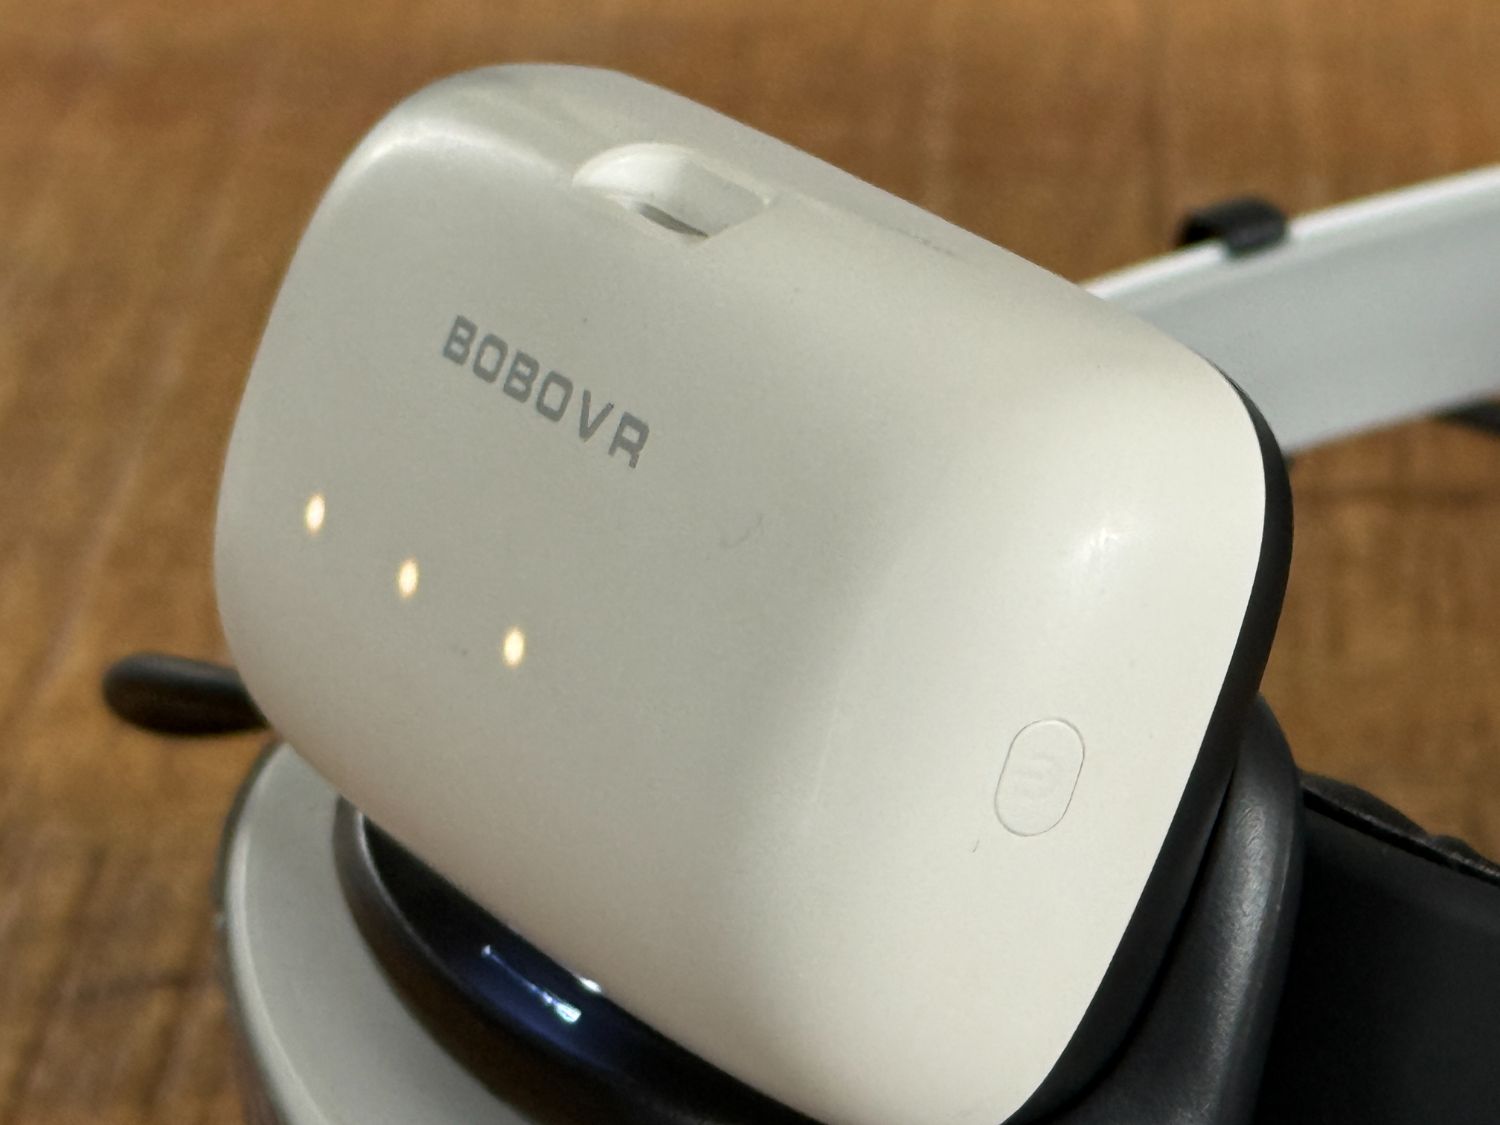
Battery dock check button and charge LEDs
The dock's check button and charge LEDs.

Fitting it on a guest

01
Tilt the headband up and slide it on from the front. It fits right over glasses.
02
Tilt it down so the lenses settle in front of the eyes.
03
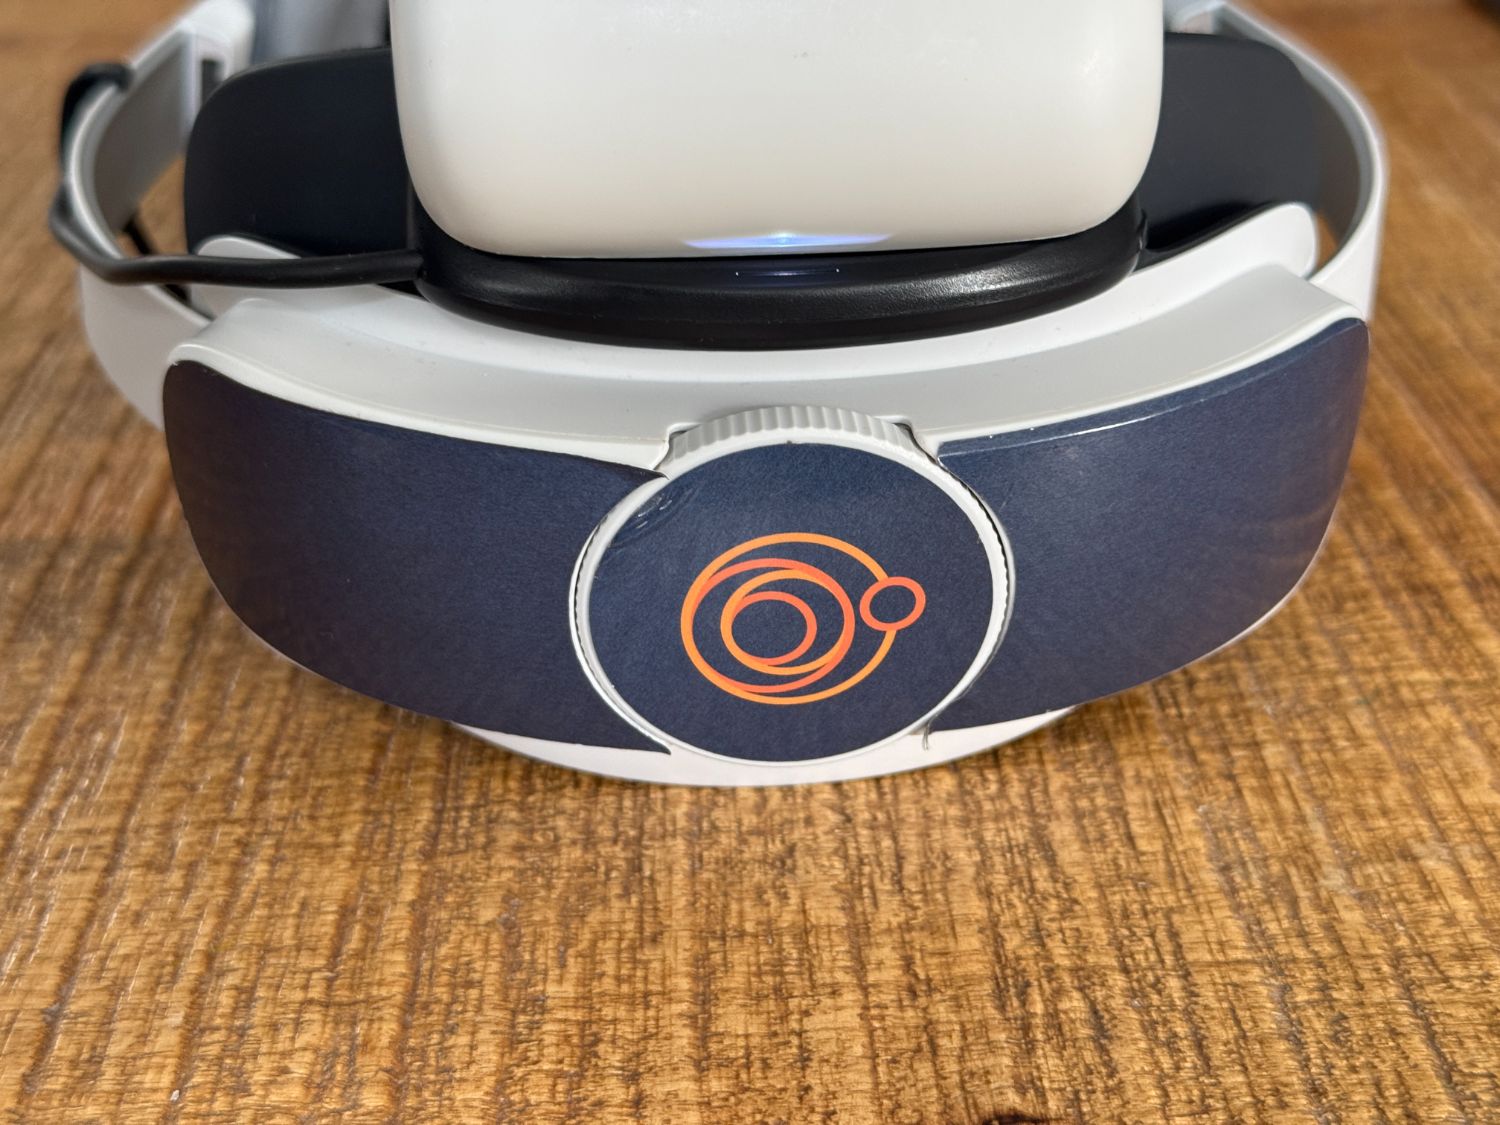
Tighten the dial at the back for a snug, stable fit.
Rear tightening dial
The rear dial — turn to tighten the fit.
Section 04

Headphones

Bose QuietComfort, used wired into the headset. This is the fiddly part — read the golden rule first.

Golden rule

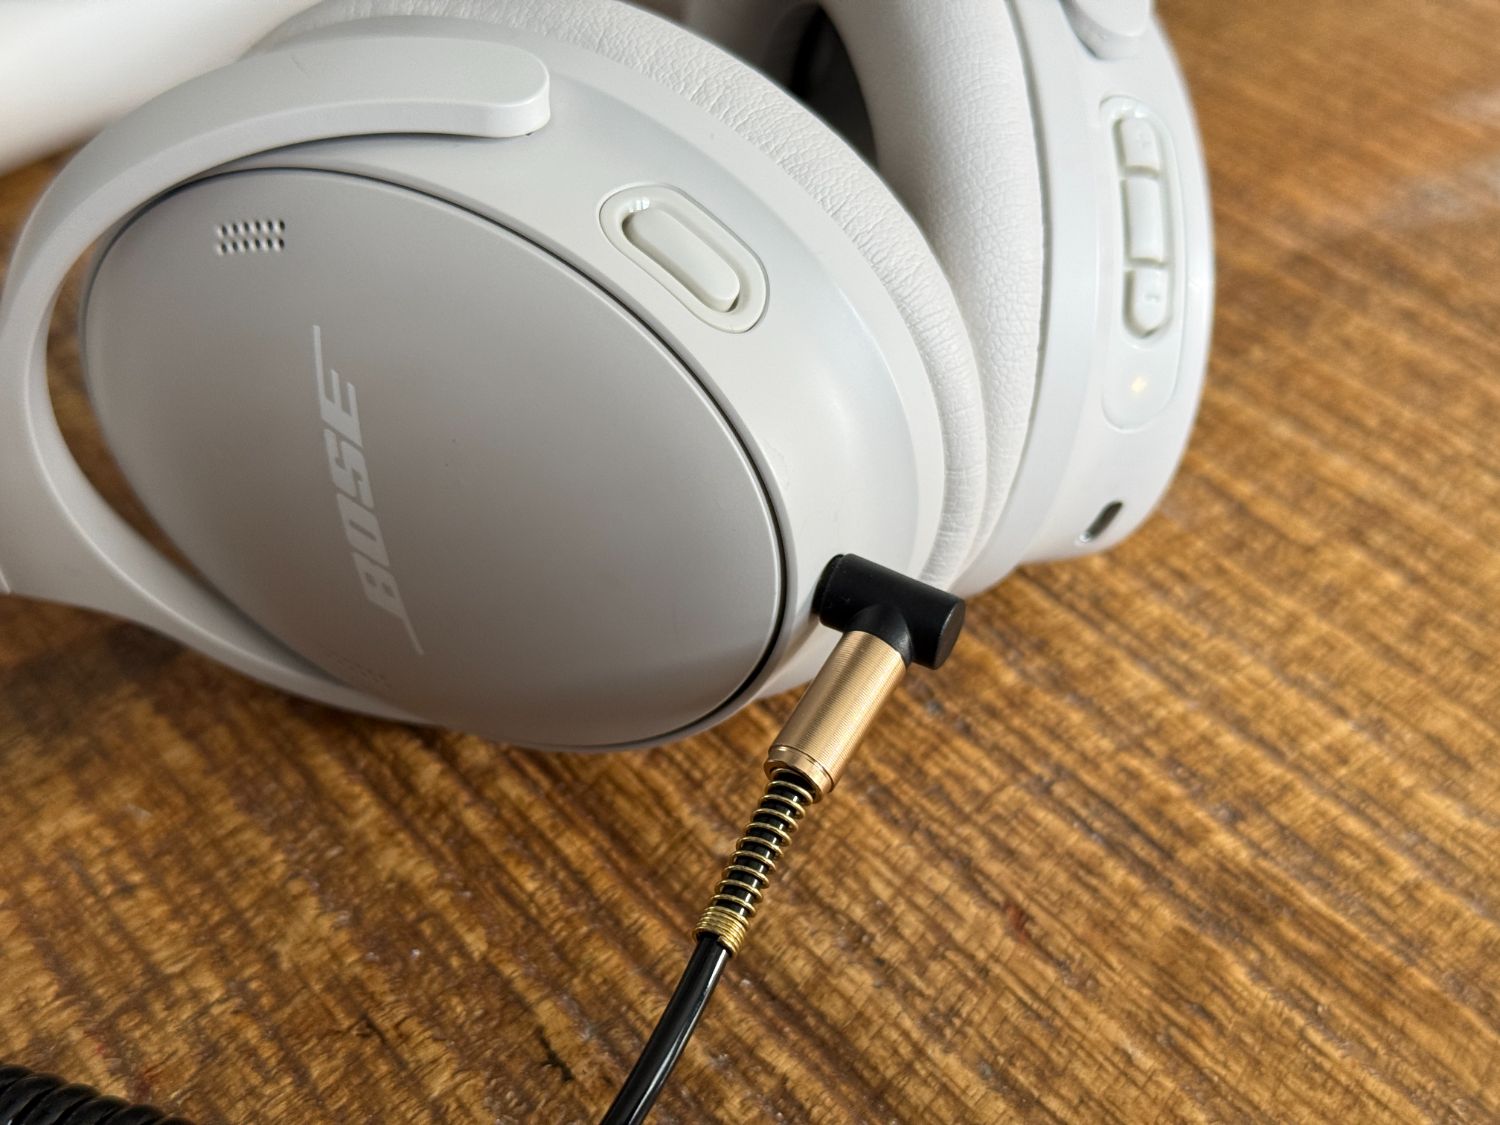
Never unplug the small 2.5 mm cable from the headphones. Unplugging it resets the volume — and the next guest won't be able to hear.

The controls
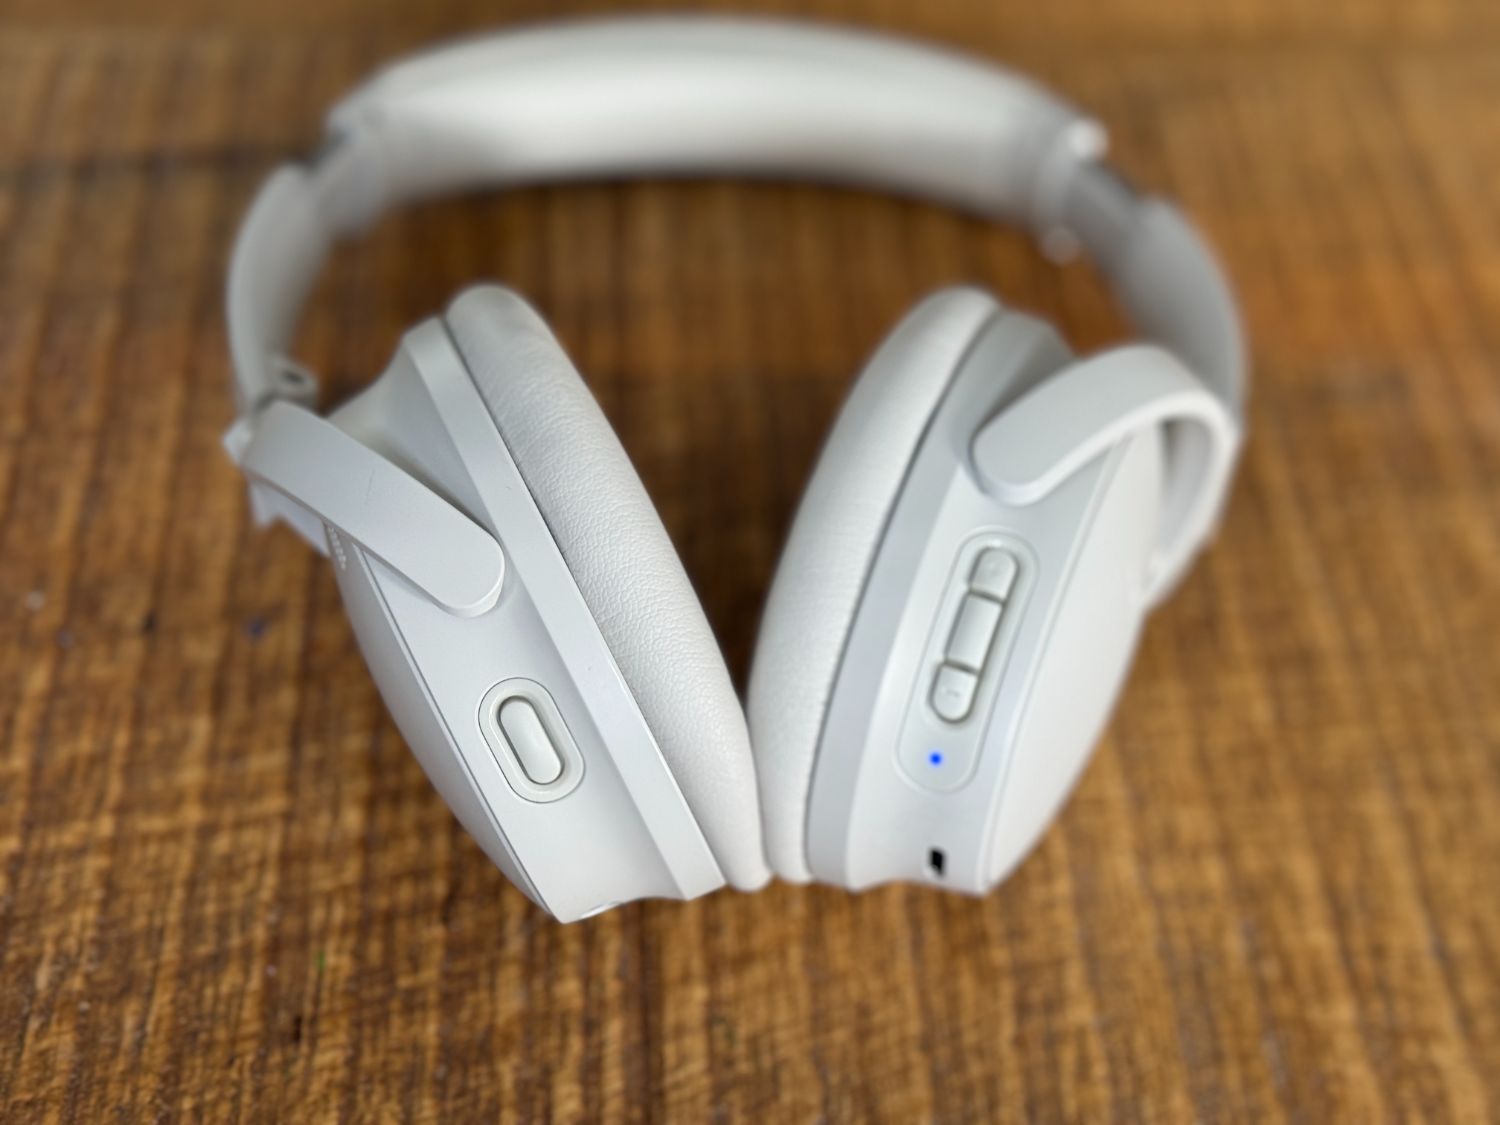
Power
Switch on the side. Leave the headphones on while in use.
Noise-cancelling
A big labelled button on the left side. Press it for noise-cancelling — you'll hear a voice say "Quiet" when it's on.
Volume
Set on the headphones. These run a bit quiet, so turn it all the way up. Once set, leave it — it carries over guest to guest.
Headphone power, action button and volume controls
Headphone controls: power/pairing, action button and volume.
The 2.5 mm jack seated in the headphones
The 2.5 mm jack seated — never unplug this.

If the volume gets reset

A guest tugged the cable, or it came loose. Here's how to bring sound back:

01
Plug the 2.5 mm cable firmly back into the headphones.
02
Press volume up on the headphones all the way — these run quiet, so maximum is right.
03
Confirm noise-cancelling is on (toggle on the left side).
04
Test it yourself before handing it to the next guest.
Section 05

Audio cabling

The Pico 4 UE is USB-C only — that's why these adapter cables exist. There are two kinds. Most of the time, use the black Y-split.

Preferred
Black · Y-split

Charges while it plays

USB-C (headset)
  ├─ USB-C → battery dock (power)
  └─ 3.5 mm → 3.5-to-2.5 mm → Bose

The battery keeps charging the headset while audio is plugged in — maximum runtime.

Use this whenever the battery dock is on.

Coiled

Lighter & simpler

USB-C (headset) → 2.5 mm → Bose

One cable, no splitter — but no passthrough charging.

Use this when you don't need the battery dock.
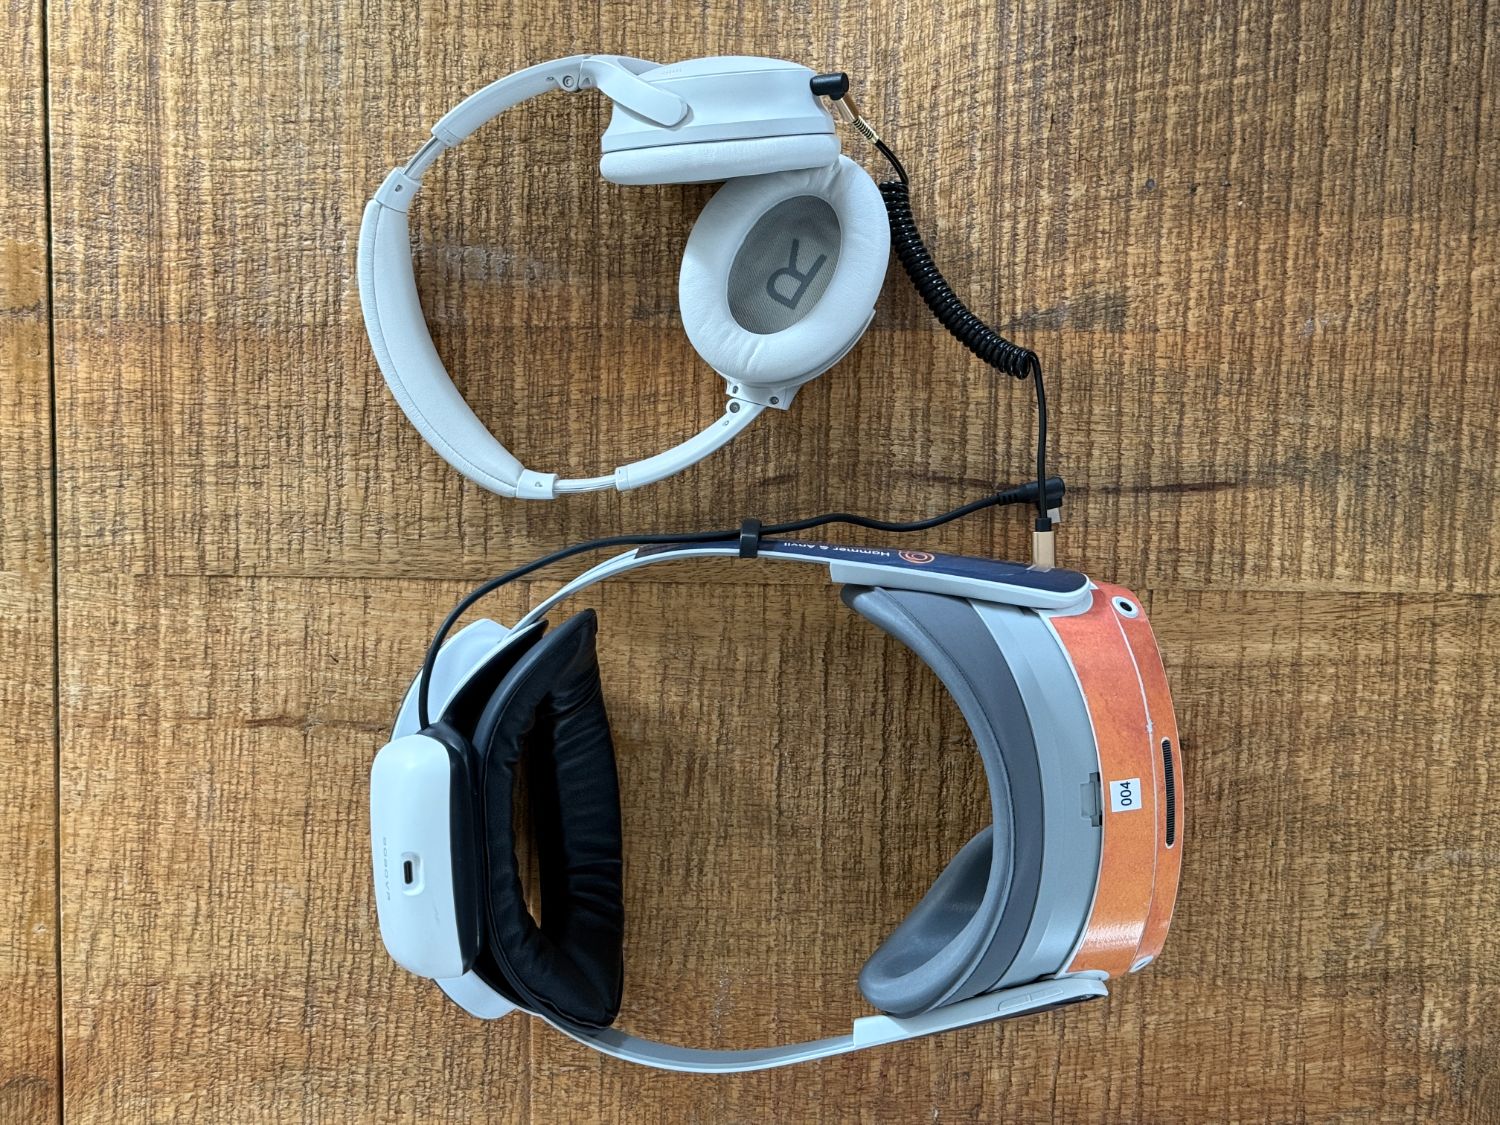
The split cable connecting the headset, battery dock and headphones, top-down
The connected setup, top-down — headset + battery dock + headphones. Photo shows the coiled cable; the black Y-split connects the same way, plus power to the dock.
Section 06

The guest experience

There's no menu and nothing to press. The video plays on its own. Here's the whole script you give a guest:
01
"Tilt the headband up, slip it on — it works over glasses — then tilt it down and turn the dial at the back to tighten."
02
"The video starts on its own once it's on your head."
03
"Take it off any time — the video starts again from the beginning when the next guest puts it on."
04
"The volume's already set — just relax and enjoy it."
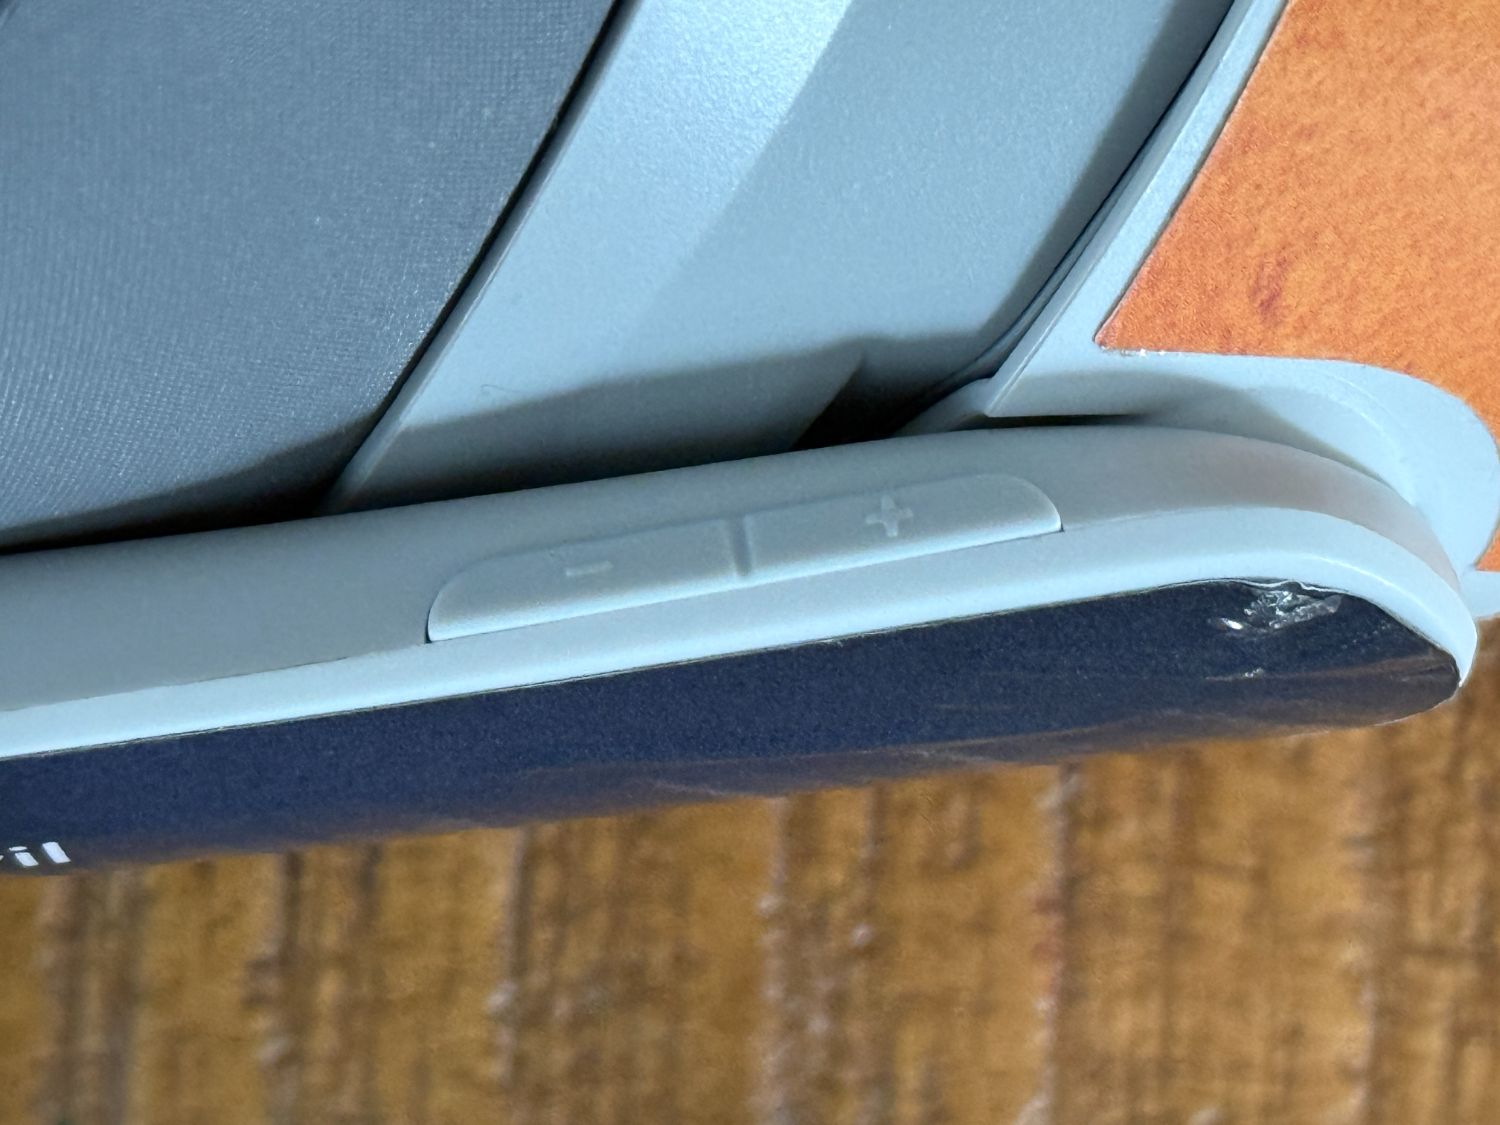
RECENTRING If the view looks off-centre, press the right-hand back button to recentre. It's printed as volume-down, but that's been reallocated — it won't change the volume. The front + button does nothing, so ignore it.
The recentre and volume buttons on the headset
Recentre with the right-hand back button (printed as volume-down). The front + button does nothing.
Section 07 Optional

The router — set and forget

The video plays fully offline, so the router is just a backup. The Wi-Fi is there for one reason: so we can push new content to the headsets or log in remotely if there's ever a problem. Plug it in, leave it alone — and if something's truly wrong, the phone is the real fix.

Attach the 6 antennas
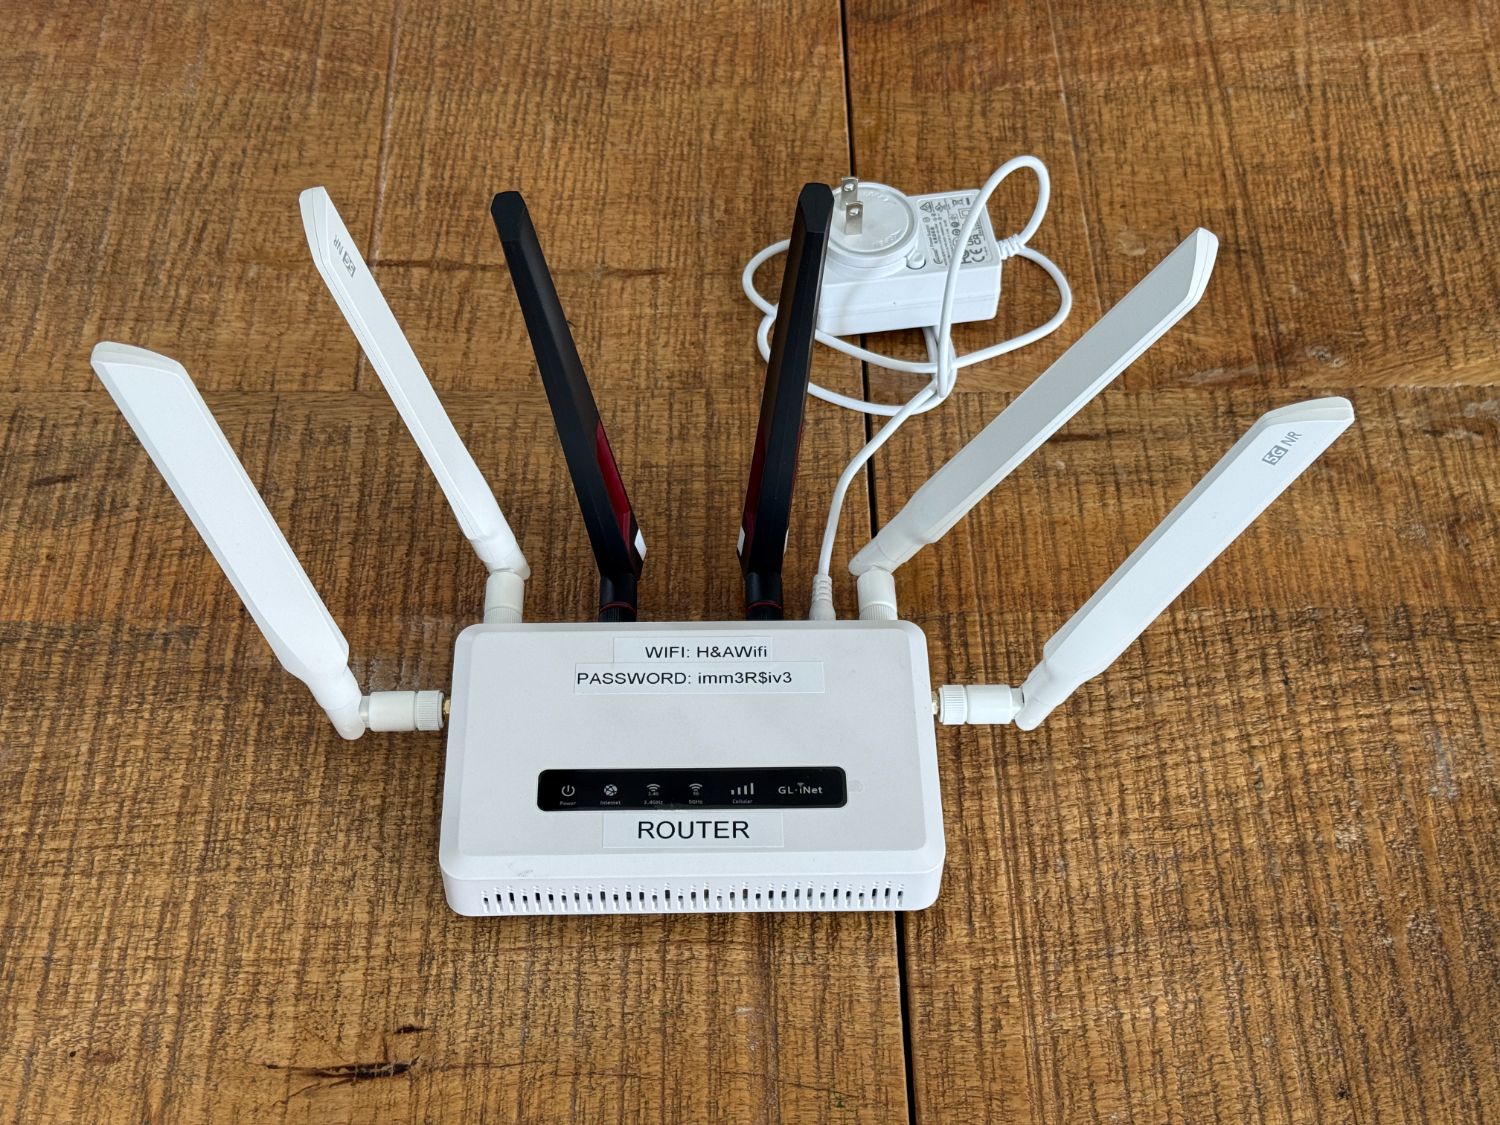
2 black sticks → Wi-Fi
The two black stick antennas go on the two Wi-Fi ports.
4 white paddles → cellular
The four white paddle antennas go on the cellular ports: MAIN · MIMO1 · MIMO2 · DIV-GNSS.
01
Plug in the wall power adaptor (in the box).
02
Screw on all 6 antennas as above.
03
The Wi-Fi password is printed on the router. Headsets connect on their own — nothing to type.
04
That's it — leave it running and don't touch it.
Router with all six antennas and the Wi-Fi password label
All six antennas on; Wi-Fi name + password are printed on the front.
Section 08

Charging routine

During the day

Top up between sessions

Drop battery docks onto the charging block whenever a headset is resting. Use the dock's check button + LEDs to see what's low.

Overnight

Charge both, fully

Every night, fully charge both the headset and the battery dock so each unit starts the next day at 100%.
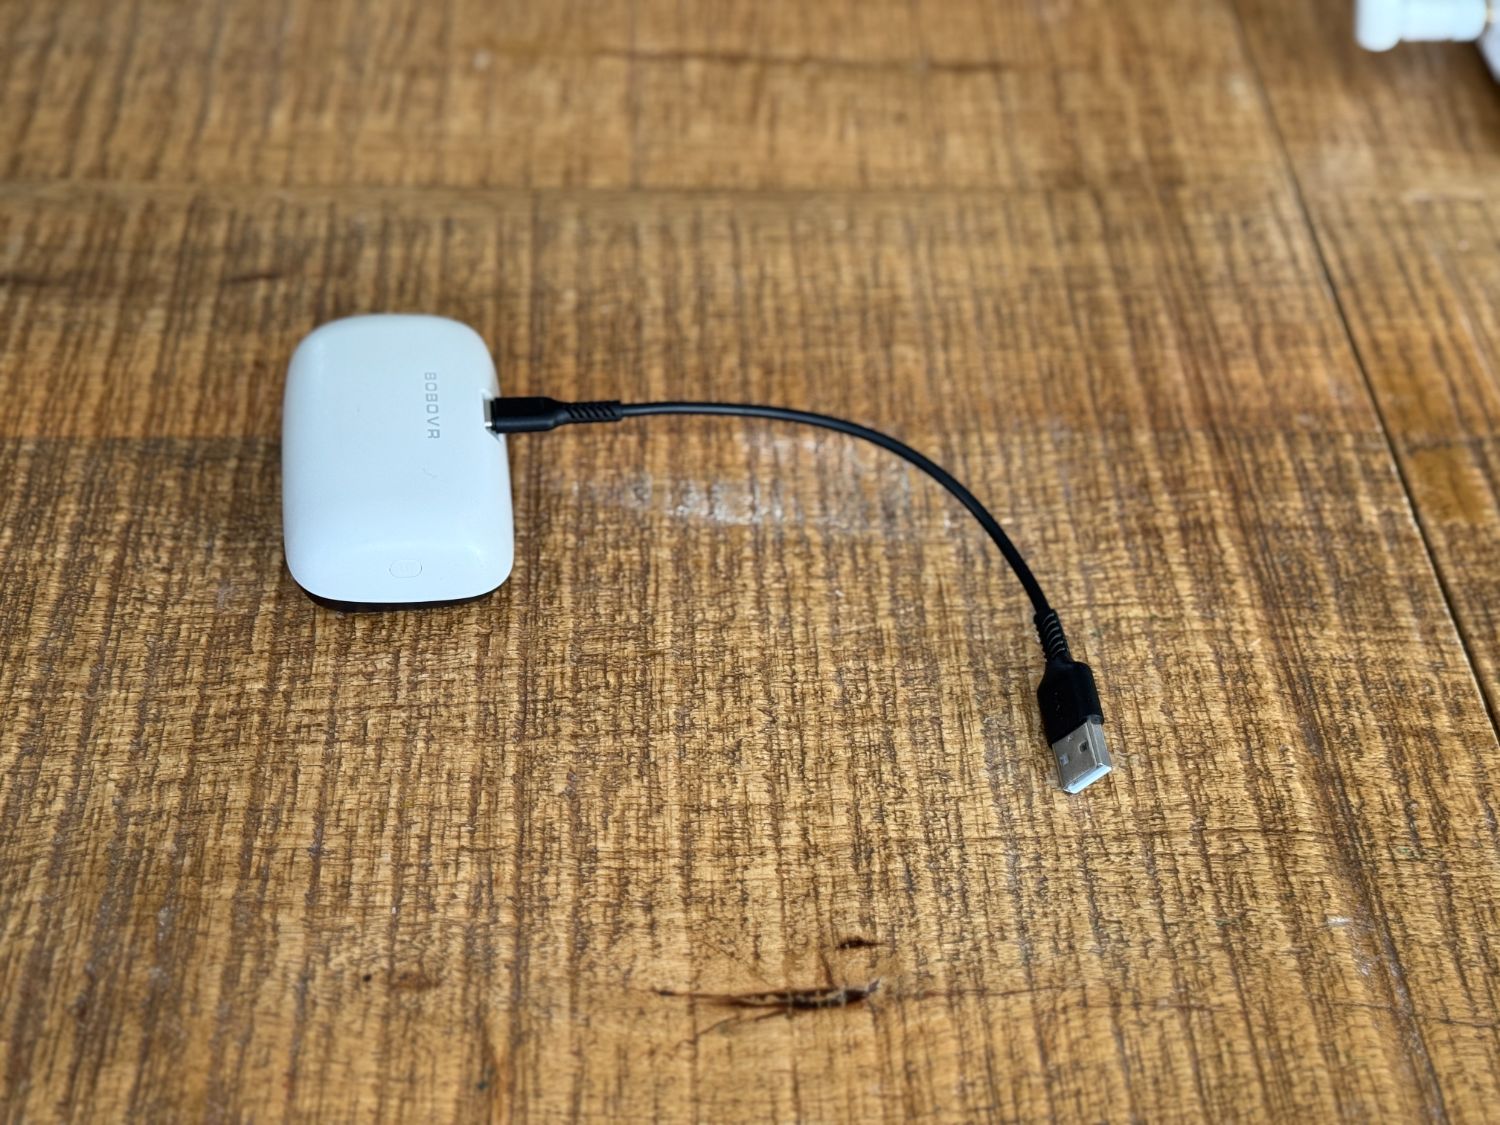
Battery dock charging on its cable
A battery dock topping up — press its button to read the level LEDs.
Section 09

Troubleshooting

Most issues are sound or charge. Work down the list — if you're still stuck, call us.

Symptom
{{ t.symptom }}
Fix
{{ t.fix }}
Still stuck?
519-574-0018 Text or call — we'll walk you through it.
Section 10

End of day · repack & return

01
Charge everything overnight — both headsets and battery docks, fully.
02
Wipe down lenses (lens wipes) and ear cushions (Lysol wipes).
03
Unplug every cable before packing — headphone jacks, audio cables and charging leads — so nothing gets bent, snagged or damaged in transit. (You'll just reset the volume to maximum on first setup next time.)
04
Repack against the kit checklist in Section 02 — it's your return checklist. Count all 10 headsets, 10 headphones, every cable, the router + 6 antennas, the charging gear, and the wipes.